Formstack Step-by-Step Guide to Building Workflows
Building efficient digital workflows can transform how your organization handles processes, from data collection to document generation and electronic signatures. Formstack Workflows combines Forms, Documents, and Sign into one sequence builder to capture data, generate documents, and collect eSignatures from one no-code flow. This comprehensive guide walks you through everything you need to know about creating powerful workflows in Formstack.
What Are Formstack Workflows?
Formstack Workflows is part of the Formstack Platform that enables businesses to create seamless digital processes without writing a single line of code. The visual workflow builder features an intuitive drag-and-drop interface to build workflow steps and automatically recognizes Formstack apps on your accounts, making it accessible even for non-technical users.
Unlike traditional form builders that only capture data, Formstack Workflows orchestrates entire business processes by connecting multiple applications and automating handoffs between team members.
Key Capabilities of Formstack Workflows
Workflows has the capability of combining all Formstack apps including Forms for collecting information, Documents for creating branded documents, and Sign for enabling multiple participants to e-sign documents. This integration allows you to:
- Collect data through customizable forms
- Automatically generate branded documents using collected data
- Route documents for electronic signatures
- Map data between different workflow steps
- Assign tasks to specific team members or roles
- Track progress and identify bottlenecks
Understanding Workflow vs. Workflow Forms
Before diving into building workflows, it's important to understand that Formstack offers two distinct features. Workflow Forms allow you to create a single form where multiple submitters can participate in filling it out, while the Workflows Product combines different Formstack apps into one sequence.
For this guide, we'll focus on the newer Workflows Product, which provides more comprehensive automation capabilities.
Prerequisites: What You Need to Get Started
Workflows is accessible to Suite plan customers and multi-product customers, with a 14-day Platform trial available. Before building your first workflow, ensure you have:
- Proper Access: Admin or Standard user access to Workflows
- Formstack Apps: At least Forms (required as the first step) and optionally Documents or Sign
- Clear Process Map: A documented understanding of your business process
- Team Roles Defined: Knowledge of who needs to participate at each step
Step-by-Step Guide to Building Your First Workflow
Step 1: Planning Your Workflow
Before touching the Formstack interface, invest time in proper planning. Map out your entire process on paper or using a flowchart tool:
- Identify Entry Points: How does the process start?
- Define Steps: What happens at each stage?
- Map Participants: Who is involved and when?
- Determine Data Flow: What information transfers between steps?
- Set Decision Points: Where do approvals or conditional logic occur?
For example, an employee onboarding workflow might include:
- New hire fills out personal information (Form)
- HR reviews and adds employment details (Form)
- System generates offer letter (Document)
- Employee signs offer letter (Sign)
- Manager receives signed copy (Email notification)
Step 2: Creating Your Workflow
To create a new workflow:
- Log into Formstack Platform at admin.formstack.com
- Navigate to the Workflows section
- Click "Create New Workflow"
- Name your workflow descriptively (e.g., "New Employee Onboarding Process")
- Add a detailed description for team members
Workflows automatically save and produce a unique live URL once started, though it's not possible to create a custom-friendly URL at this time.
Step 3: Building the Initial Form Step
A workflow must begin with a Form or Forms for Salesforce app step. This is your workflow's entry point where data collection starts.
Creating Your First Form Step:
- From the workflow builder, drag and drop "Forms" from available apps
- Choose to create a new form or select an existing one
- Build your form using the drag-and-drop form builder
- Add relevant fields: text inputs, dropdowns, file uploads, etc.
- Implement conditional logic for dynamic form behavior
- Configure form settings (notifications, confirmations, integrations)
Pro Tip: Use section breaks in your form to logically organize information. This makes data mapping easier in subsequent workflow steps.
Step 4: Configuring Form Step Assignment
From Assignment under Step Builder, you can toggle off the inherited assignee from the previous step and assign the form step to a different person. This determines who receives the workflow at this stage.
Assignment options include:
- Specific Email Addresses: Manually enter email addresses
- Dynamic Assignment: Use email addresses captured in previous steps
- Multiple Assignees: Send to multiple people simultaneously
Important Note: Once a Documents or Sign step takes place in the flow, the workflow is no longer sent to the new assignee and remaining Forms steps will need to have assignees reconfigured.
Step 5: Adding Additional Form Steps
You can include multiple form steps in your workflow for scenarios where different people need to provide information sequentially.
After setting up your first step, you can include additional Form steps to collect workflow participant information. Each form step can:
- Collect different information from different participants
- Pre-fill data from previous steps (more on this below)
- Have unique assignment rules
- Include custom submission messages
Step 6: Mapping Data Between Steps
Data mapping is where workflows become truly powerful. From Mapping under Step Builder, you can map previous Forms and Sign steps' qualifying fields or metadata to create prefilled answers in the Form step.
How to Map Data:
- Open the step where you want to display mapped data
- Navigate to the Mapping section in Step Builder
- Select the source field from a previous step
- Choose the destination field in the current step
- Repeat for all fields you want to pre-fill
Common Mapping Scenarios:
- Name and contact information flowing through all steps
- Approval decisions triggering conditional paths
- File attachments carrying forward
- Custom metadata like submission timestamps
For advanced data mapping techniques, check out our JSON Editor for structuring complex data transfers.
Step 7: Adding Document Generation Steps
After setting up your first Form step, you can add a Documents step to collect participant data and generate branded documents.
Two Ways to Add Documents:
- Generate from Form: Automatically creates a document with all form fields mapped
- Select Existing Document: Choose a pre-built document template
If you choose to generate from form, the document will be automatically created with all fields from the form mapped to the new corresponding document.
Configuring Document Delivery:
After setting up mapping, you can create an email delivery with a PDF copy of the document by mapping data collected during the workflow or manually typing in delivery field options.
Document delivery options include:
- Recipient email addresses (static or dynamic)
- Custom subject lines
- Personalized email body text
- PDF attachments of generated documents
Current Limitation: Data from a Document step can't be used in a workflow yet, so plan your data flow accordingly.
Step 8: Implementing Electronic Signatures
The Sign step enables you to collect electronic signatures on documents generated in your workflow or from Sign templates.
Basic Sign Step Configuration:
- Drag and drop "Sign" from available apps
- Select the document for signing
- Define signers (can be mapped from previous steps)
- Configure signature fields and other form fields
- Set signing order if multiple signers are involved
Advanced Feature: In-Session Signing
In-session signing makes it easy and efficient to complete a form and sign a document without toggling screens, ideal for in-person meetings or events.
To enable in-session signing:
- Create a workflow with a Sign step following a Form step
- Open the Sign step and select Edit Step
- Choose a document for signing
- Toggle on the In-session signer for participants and map the Name field from the Form step
- Map additional data fields for participants to fill
The customized workflow URL will route the user to a form to fill out, and once submitted, the workflow will display the filled document for the user to review and sign without being redirected away.
Step 9: Testing Your Workflow
Before deploying your workflow to end users, thoroughly test it:
- Complete a Test Run: Go through the entire workflow as each participant
- Verify Data Mapping: Ensure information flows correctly between steps
- Check Email Notifications: Confirm all notifications are sent to the right people
- Test Edge Cases: What happens if someone skips optional fields?
- Review Generated Documents: Verify formatting and data accuracy
- Validate Signatures: Ensure signature capture works properly
Use a Website SEO Score Checker to ensure any landing pages connected to your workflow are optimized for search engines.
Step 10: Publishing and Sharing Your Workflow
Once testing is complete:
- Click "Publish" to make your workflow live
- Copy the unique workflow URL
- Share the URL with appropriate stakeholders
- Consider embedding the form on your website
- Set up monitoring and analytics
For website integration, you might need to adjust your Htaccess Redirect settings to properly route users to your workflow.
Advanced Workflow Features
Workflows PRO: Enhanced Automation Capabilities
Workflows PRO adds Step Logic, Approvals, and the API Connector, enabling conditional logic and customizable approvals in your workflows.
Key PRO Features:
- Step Logic: Implement conditional branching based on data inputs
- Approval Processes: Create customizable approval workflows with group approvals
- API Connector: Easily pre-fill forms with data from your CRM, EHR, and other central business systems through the powerful API Connector
Collaboration Features
You can share workflows or shared folders with other Workflows users to configure or build them. This enables:
- Team-based workflow development
- Shared workflow libraries
- Consistent process implementation across departments
Workflow Management Best Practices
- Use Descriptive Names: Name workflows clearly so team members understand their purpose
- Document Your Processes: Use the Search Bar from your Workflow window to search for workflow titles you have access to, so clear naming helps with discoverability
- Create Copies for Testing: From available workflows, select one or more workflows and click Copy to populate a duplicate workflow with "-COPY" in its title
- Monitor Performance: Track workflow completion times to identify bottlenecks
- Gather User Feedback: Regularly ask participants about workflow usability
Common Workflow Use Cases
1. Employee Onboarding
Create a seamless onboarding experience:
- New hire form submission
- HR verification and additions
- Automated offer letter generation
- Electronic signature collection
- Equipment request routing
- IT account setup triggers
2. Purchase Requisitions
Streamline procurement processes:
- Employee submits purchase request form
- Manager approval step
- Budget verification
- Vendor quote collection
- Purchase order generation
- Finance approval and processing
3. Customer Onboarding
Automate client intake:
- Client information collection form
- Needs assessment questionnaire
- Service agreement generation
- Electronic contract signing
- Payment processing
- Welcome email with next steps
4. Event Registration
Manage event participants efficiently:
- Registration form with custom fields
- Payment collection
- Confirmation email with details
- Pre-event form for preferences
- Badge generation document
- Post-event feedback survey
5. Performance Reviews
Digitize HR processes:
- Employee self-assessment form
- Manager evaluation form
- Performance summary document generation
- Goal-setting collaborative form
- Electronic acknowledgment
- HR records integration
Troubleshooting Common Workflow Issues
Issue 1: Workflow Steps Not Triggering
Problem: Subsequent steps don't execute after form submission.
Solution: Forms or steps completed outside of the workflow will not trigger the next steps or workflow actions to run. Ensure participants use the workflow URL, not standalone form links.
Issue 2: Data Not Mapping Correctly
Problem: Pre-filled fields show incorrect or missing data.
Solutions:
- Verify field mapping in Step Builder
- Check that source fields contain data
- Ensure field types match between steps
- Review conditional logic that might hide fields
Issue 3: Assignment Emails Not Sending
Problem: Workflow participants aren't receiving notification emails.
Solutions:
- Verify email addresses are correctly entered or mapped
- Check spam/junk folders
- Confirm email notifications are enabled for the step
- Test with a different email address to rule out server blocks
Issue 4: Cannot Rearrange Steps
Problem: Need to change step order after creation.
Solution: At this time, steps cannot be rearranged within a workflow. You must delete the steps and then add the steps and configurations once more. Plan your workflow structure carefully before building.
Issue 5: Partial Configuration Loss
Problem: Step configuration isn't saving.
Solution: A step cannot capture partially saved configurations unless all required fields are configured when creating a step. Complete all required fields before saving.
Workflow Optimization Strategies
Optimize for Mobile Users
Ensure your workflows work seamlessly on mobile devices. Test with a Mobile Friendly Test to verify responsive design.
Improve Load Times
Workflow performance matters for user experience:
- Minimize form field count where possible
- Optimize image sizes using an Image Compressor
- Reduce unnecessary conditional logic
- Implement GZIP compression on embedded pages
Enhance Data Security
Protect sensitive information in workflows:
- Enable SSL encryption on all workflow pages
- Implement proper access controls
- Use secure password generation for user accounts
- Regular security audits of workflow processes
Monitor Workflow Performance
Track key metrics to identify improvement opportunities:
- Average completion time per workflow
- Drop-off points where users abandon the process
- Step-by-step completion rates
- User feedback and satisfaction scores
Use automation tools to generate regular reports. For related automation insights, check out our guide on AI Tools for Productivity.
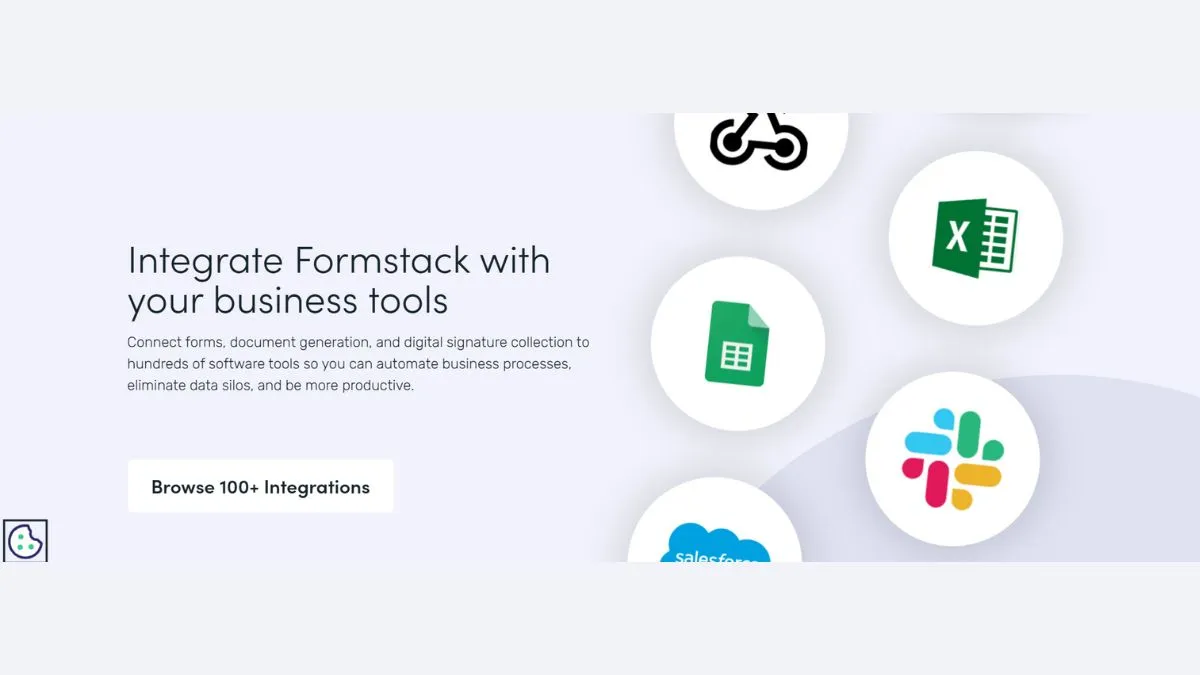
Integration Possibilities
CRM Integration
Connect workflows to customer relationship management systems:
- Salesforce native integration
- HubSpot data synchronization
- Zoho CRM connectivity
- Custom API connections with Workflows PRO
Payment Processing
Add payment collection to workflows:
- Stripe integration for credit card processing
- PayPal for flexible payment options
- Square for point-of-sale integration
- Automated receipt generation
Marketing Automation
Connect workflows to marketing platforms:
- Mailchimp for email campaigns
- ActiveCampaign for customer journeys
- Constant Contact for newsletter management
- Automated lead nurturing sequences
Project Management Tools
Integrate with collaboration platforms:
- Asana task creation from workflow submissions
- Trello card generation
- Monday.com board updates
- Slack notifications for workflow events
For more integration ideas, explore JotForm Alternatives that might complement your Formstack workflows.
Formstack Workflows vs. Alternatives
While Formstack Workflows is powerful, it's worth understanding how it compares to other solutions in the market.
When Formstack Excels
Formstack's workflows allow you to assign sections to different team members, track progress from start to finish, and use Workflow Logic to send forms back for corrections. It's particularly strong for:
- Organizations already using multiple Formstack products
- Industries requiring strong compliance features (healthcare, education)
- Teams needing visual workflow builders without coding
- Businesses wanting integrated document generation and eSignatures
Potential Limitations
Based on user feedback, consider these factors:
- Formstack's plans start at $99 per month, which is expensive, especially for small teams or startups
- Limited customization compared to low-code platforms
- Some users find Formstack's customization options limited for highly dynamic forms
Popular Alternatives to Consider
If Formstack doesn't meet your needs, explore these alternatives:
- Jotform: Jotform offers a forever-free plan and provides over 10,000 readymade form templates
- Typeform: Known for conversational, engaging form experiences
- Google Forms: Completely free with unlimited forms and responses
- Monday.com: Better for complex project workflows beyond forms
- Zapier: For connecting multiple applications in custom workflows
For a comprehensive comparison, read our guide on Best JotForm Alternatives.
Future of Workflow Automation
Workflow automation continues to evolve rapidly. Recent enhancements include Formstack Streamline, which provides instant visibility into tasks, submissions, and document processes.
Emerging Trends
- AI-Powered Workflows: Intelligent routing based on content analysis
- Voice-Activated Forms: Hands-free data entry capabilities
- Advanced Analytics: Predictive modeling for workflow optimization
- Blockchain Integration: Immutable audit trails for compliance
- No-Code Expansion: Even more sophisticated automation without programming
Stay updated on workflow automation trends with our AI Tools guides.
SEO Considerations for Workflow Landing Pages
If you're embedding workflows on public-facing pages, optimize for search engines:
Technical SEO
- Ensure proper XML Sitemap inclusion
- Optimize Meta Tags for workflow landing pages
- Use HTML Minification for faster loading
- Implement Schema Markup for rich snippets
Content Optimization
- Create keyword-rich descriptions of workflow purposes
- Use Keyword Research Tools to identify search terms
- Write compelling call-to-action copy
- Include helpful instructions and FAQs
Performance Optimization
- Run Website SEO Score Checks regularly
- Monitor Page Load Speed
- Optimize images with our Image Resizer
- Follow Core Web Vitals best practices
Workflow Security Best Practices
Protect sensitive data flowing through your workflows:
Authentication & Access Control
- Implement multi-factor authentication
- Use role-based access controls
- Regular access audits and user permission reviews
- Strong password requirements
Data Protection
- Enable SSL/TLS encryption for all workflow pages
- Regular SSL certificate checks
- Implement data retention policies
- Secure file upload validation
- Regular security vulnerability assessments
Compliance Considerations
- HIPAA compliance for healthcare workflows
- GDPR compliance for European data subjects
- SOC 2 certification verification
- Regular compliance audits
- Documentation of data processing activities
For more on website security, explore our Website Tracking Tools.
Measuring Workflow Success
Track these key performance indicators (KPIs):
Efficiency Metrics
- Time to Completion: Average time from workflow start to finish
- Processing Time per Step: Identify bottleneck stages
- Automation Rate: Percentage of process handled without manual intervention
- Error Rate: Frequency of corrections or rejected submissions
User Experience Metrics
- Completion Rate: Percentage of started workflows that finish
- Abandon Rate: Where users drop off in the process
- User Satisfaction Scores: Direct feedback from participants
- Support Ticket Volume: Decrease in help requests after workflow implementation
Business Impact Metrics
- Cost Savings: Reduction in manual processing costs
- Productivity Gains: Time saved by automating manual tasks
- Compliance Improvements: Reduced errors in regulated processes
- Customer Satisfaction: Impact on client experience metrics
Create dashboards to monitor these metrics continuously. For data visualization, consider tools like Plotly or Recharts.
Workflow Documentation and Training
Ensure successful workflow adoption:
Create User Guides
- Step-by-step instructions for each participant role
- Screenshots or screen recordings of the process
- FAQ section addressing common questions
- Troubleshooting guides for typical issues
- Contact information for support
Conduct Training Sessions
- Role-based training for different workflow participants
- Hands-on practice with test workflows
- Q&A sessions to address concerns
- Regular refresher training for updates
- Create video tutorials for on-demand learning
Maintain Change Logs
Document all workflow modifications:
- Date of change
- What was modified and why
- Who made the change
- Impact on existing processes
- Communication sent to stakeholders
Advanced Customization Techniques
Custom CSS Styling
While Formstack provides styling options, advanced users can:
- Apply custom CSS for unique branding
- Create responsive designs that adapt to screen sizes
- Test with Screen Resolution Simulator
- Ensure consistency with brand guidelines
JavaScript Enhancements
Add custom functionality with JavaScript:
- Dynamic field calculations
- Custom validation rules
- Enhanced user interface interactions
- Integration with third-party services
- Use JavaScript Minifier for production code
API Integrations
Leverage Formstack's API for:
- Custom reporting dashboards
- Bidirectional data synchronization
- Complex business logic implementation
- Integration with legacy systems
- Real-time webhook notifications
Conclusion
Building effective workflows in Formstack requires thoughtful planning, careful configuration, and ongoing optimization. By creating workflow forms in the builder, mapping your digital process, and publishing to share with team members, you can streamline complex business processes.
Key takeaways for success:
- Plan Before Building: Map your entire process before touching the workflow builder
- Start Simple: Begin with basic workflows and add complexity gradually
- Test Thoroughly: Complete multiple test runs before launching to users
- Monitor Performance: Track metrics to identify improvement opportunities
- Iterate Continuously: Gather feedback and refine workflows regularly
- Document Everything: Maintain clear documentation for team members
- Prioritize Security: Implement robust security measures for sensitive data
- Optimize for Users: Focus on creating intuitive experiences for all participants
Whether you're automating employee onboarding, customer intake, purchase approvals, or any other business process, Formstack Workflows provides the tools you need to eliminate manual work and reduce errors.
Start small, measure results, and gradually expand your workflow automation efforts. The time invested in building efficient workflows pays dividends in productivity, accuracy, and employee satisfaction.
Additional Resources
Formstack Official Documentation
BrightSEOTools Resources
- Free SEO Checker Tools
- Website Audit Checklist 2025
- Technical SEO Secrets
- Best AI Tools for Coding
- HubSpot Alternative Pricing Guide
Related Tool Alternatives
Workflow Optimization Tools
By following this comprehensive guide, you'll be well-equipped to design, build, and optimize Formstack workflows that transform your business processes. Remember that workflow automation is a journey—start with one process, perfect it, then expand to others.
Happy workflow building!