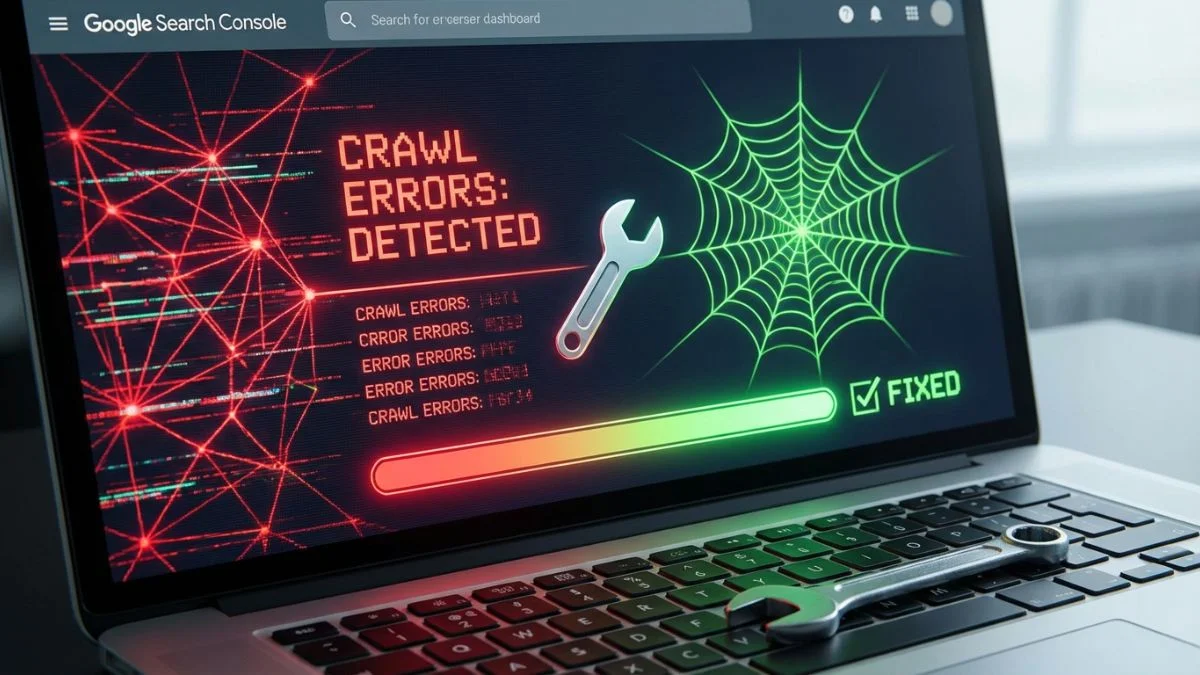
How to Fix Crawl Errors in Google Search Console
How to Fix Crawl Errors in Google Search Console: The Complete Guide for 2026
What Are Crawl Errors and Why Should You Care?
Crawl errors occur when Googlebot, the automated software that Google uses to discover and scan web pages, tries to access a URL on your website but fails to retrieve it successfully. When this happens, Google cannot read the content on that page, which means it cannot index it, and an unindexed page is essentially invisible in search results.
Think of Googlebot as a librarian trying to catalog every book in a massive library. If a book is locked behind a door, has been moved without a forwarding note, or the shelf collapses when the librarian reaches for it, that book never makes it into the catalog. Crawl errors are those locked doors, missing forwarding notes, and collapsing shelves of the web.
The consequences of ignoring crawl errors extend far beyond a few missing pages. According to research published by Semrush's site audit studies, websites with unresolved crawl errors experience an average decline of 15 to 20 percent in organic traffic over a six-month period. The reason is straightforward: crawl errors waste your crawl budget, prevent valuable pages from being indexed, and can signal to Google that your site is poorly maintained.
Google Search Console, the free tool provided by Google for website owners, is your primary resource for identifying and monitoring crawl errors. The Pages report (which replaced the older Coverage report in 2022) gives you a comprehensive view of every URL that Google has attempted to crawl on your site and the outcome of each attempt. Understanding how to read this report and act on its findings is one of the most important technical SEO skills you can develop.
Types of Crawl Errors in Google Search Console
Google Search Console categorizes crawl errors into several distinct types, each pointing to a different underlying problem. Before you can fix anything, you need to understand what each error type means and what causes it. The following table provides a complete breakdown of every crawl error type you may encounter in the Pages report.
| Error Type | HTTP Status Code | What It Means | Severity |
|---|---|---|---|
| Server Error (5xx) | 500, 502, 503 | Your server failed to respond or returned an error when Googlebot requested the page | Critical |
| Not Found (404) | 404 | The requested page does not exist on your server | High |
| Soft 404 | 200 (misleading) | Page returns 200 OK but content indicates the page is empty or non-existent | High |
| Redirect Error | 3xx (chains/loops) | Redirect chain is too long, creates a loop, or the redirect URL exceeds the max length | High |
| Blocked by robots.txt | N/A | Your robots.txt file is preventing Googlebot from accessing the page | Medium to High |
| DNS Resolution Error | N/A | Google's DNS servers could not resolve your domain to an IP address | Critical |
| Crawled - Currently Not Indexed | 200 | Google crawled the page but chose not to index it due to quality or relevance concerns | Medium |
| Discovered - Currently Not Indexed | N/A | Google found the URL but has not yet crawled it, often due to crawl budget limitations | Medium |
Each of these error types requires a different diagnostic approach and a different fix. Let us walk through each one in detail, starting with the most critical errors that demand your immediate attention.
How to Find Crawl Errors in Google Search Console's Pages Report
Before you can fix crawl errors, you need to know where to find them. Google has redesigned Search Console several times over the years, and the current interface as of February 2026 organizes crawl error data primarily through the Pages report under the Indexing section. Here is a step-by-step walkthrough of how to access and interpret this data.
Step 1: Access the Pages Report
Log into Google Search Console and select your property. In the left-hand navigation menu, click on Indexing and then select Pages. This opens the main Pages report, which shows a summary chart of your indexed and non-indexed pages over time.
Step 2: Review the Summary Chart
The top of the Pages report displays a stacked area chart with two primary categories: pages that are indexed (shown in green) and pages that are not indexed (shown in gray). Below the chart, you will see a tabular breakdown of the specific reasons why pages are not indexed. Each reason corresponds to a different type of crawl or indexing issue.
Step 3: Identify Error Categories
The Pages report groups non-indexed pages by their status reason. Look specifically for entries labeled as Error (shown with a red icon). These are the true crawl errors that require your intervention. Common error labels include "Server error (5xx)," "Not found (404)," "Redirect error," and "Blocked by robots.txt." Click on any of these categories to see the specific URLs affected.
Step 4: Examine Individual URLs
After clicking into an error category, you will see a list of all affected URLs. For each URL, you can click on it to open the URL Inspection tool, which provides detailed information about when Google last crawled the page, the exact HTTP response code returned, and whether the page is in Google's index. This is where the real diagnostic work begins.
Step 5: Export the Data
For sites with many crawl errors, export the URL list by clicking the download icon in the top-right corner of the error detail view. You can export to Google Sheets or as a CSV file. This allows you to work through errors systematically in a spreadsheet, categorize them by pattern, and track your progress as you implement fixes. Cross-reference this data with your spider simulator results for a complete picture of how search engines experience your site.
Fixing Server Errors (5xx)
Server errors are the most critical type of crawl error because they indicate that your web server is fundamentally unable to serve pages to Googlebot. When Google receives a 5xx response, it means your server encountered an internal problem, was temporarily unavailable, or timed out before delivering the page. If these errors persist, Google will reduce your crawl rate and may eventually drop affected pages from the index entirely.
Common Causes of 5xx Server Errors
Server errors have many possible root causes, and pinpointing the exact one requires examining your server logs, hosting configuration, and application code. Here are the most frequent culprits based on data from HTTP Archive and analysis by Screaming Frog across millions of crawled sites.
| Error Code | Name | Common Causes | Typical Fix |
|---|---|---|---|
| 500 | Internal Server Error | Broken PHP/Python code, plugin conflicts, database connection failures | Check error logs, disable recent plugins, verify database connectivity |
| 502 | Bad Gateway | Reverse proxy or load balancer cannot reach the backend server | Restart backend services, check Nginx/Apache proxy settings, increase timeout values |
| 503 | Service Unavailable | Server overloaded, maintenance mode active, rate limiting triggered | Upgrade server resources, implement caching, check maintenance mode settings |
| 504 | Gateway Timeout | Backend server takes too long to respond, slow database queries | Optimize slow queries, increase PHP/FastCGI timeout, add database indexes |
| 520-530 | Cloudflare-Specific | Issues between Cloudflare and your origin server | Check origin server health, verify SSL configuration, review Cloudflare settings |
Step-by-Step Process to Fix 5xx Errors
1. Check your server access logs. The first thing you should do is examine your server's access log and error log files. On Apache servers, these are typically located at /var/log/apache2/error.log, and on Nginx servers at /var/log/nginx/error.log. Look for entries that correspond to the timestamps when Googlebot attempted to crawl your pages. The error log will usually provide specific details about what went wrong, such as a PHP fatal error, a memory limit exceeded warning, or a database connection timeout.
2. Reproduce the error. Try accessing the affected URLs yourself using a browser and then using a tool like curl -I from the command line to see the raw HTTP response headers. Sometimes server errors only occur under specific conditions, such as high traffic load, certain user agents, or specific URL parameters. Use the HTTP Headers checker to verify what response code the server returns for each problematic URL.
3. Check server resource usage. Monitor your server's CPU usage, memory consumption, and disk I/O during the times when errors occur. Many 5xx errors result from resource exhaustion, especially on shared hosting plans. Tools like htop, top, or your hosting provider's control panel can show you real-time resource usage. If you consistently hit resource limits, consider upgrading your hosting plan or moving to a VPS or dedicated server.
4. Review recent changes. Server errors frequently appear after code deployments, plugin updates, CMS upgrades, or server configuration changes. Check your deployment history and version control system to identify any recent changes that coincided with the onset of errors. Rolling back the most recent change is often the fastest way to restore service while you investigate the root cause.
5. Implement caching. If server errors are caused by high load, implementing a caching layer can dramatically reduce the strain on your server. Tools like Varnish Cache, Redis, or a CDN like Cloudflare can serve cached versions of your pages to Googlebot and users without hitting your origin server for every request.
6. Validate the fix in Search Console. After implementing your fix, go back to the Pages report in Google Search Console, click into the server error category, and click the Validate Fix button. Google will begin re-crawling the affected URLs over the next several days. Monitor the validation progress and check the Crawl Stats report to confirm that Googlebot is no longer encountering server errors.
Fixing Not Found (404) Errors
A 404 error tells Googlebot that the page it tried to access does not exist on your server. While 404 errors are a normal part of the web and Google does not penalize sites for having them, they become a problem when they affect important pages, waste crawl budget, or result in a poor user experience. The key is to distinguish between 404 errors that matter and those you can safely ignore.
When 404 Errors Are a Problem
Not all 404 errors require action. If a page was intentionally deleted and has no incoming links or search traffic, a 404 is the correct response. However, 404 errors are problematic when the deleted page had valuable backlinks from other websites, when the URL still appears in your sitemap, when internal links on your site still point to the deleted page, when the page was receiving organic search traffic before deletion, or when the 404 was caused by a typo in your internal linking. To learn more about how broken links impact your site, read our guide on smart ways to fix broken links.
Step-by-Step Process to Fix 404 Errors
1. Categorize the 404 URLs. Export your 404 error list from Google Search Console and categorize each URL. Determine whether the page was intentionally removed, accidentally deleted, moved to a new URL, or if the URL was never valid in the first place (perhaps resulting from a malformed link on another site).
2. Check for backlinks to 404 pages. Use Ahrefs Site Explorer or Semrush's Backlink Analytics to check whether any of your 404 pages have incoming backlinks from external websites. Pages with backlinks should be redirected to preserve the link equity those backlinks provide. According to Moz's research on redirects, a 301 redirect passes approximately 90 to 99 percent of the original page's link equity to the destination URL.
3. Implement 301 redirects for moved or replaced content. For any 404 page that has been replaced by an equivalent or closely related page at a new URL, set up a 301 (permanent) redirect. In Apache, you can add redirect rules to your .htaccess file. In Nginx, you add rewrite or return 301 directives to your server configuration block. Make sure each redirect points to the most relevant existing page on your site, not just your homepage.
4. Fix internal links. Use Screaming Frog SEO Spider to crawl your site and identify all internal links that point to 404 pages. Update these links to point to the correct current URLs. This is one of the most impactful things you can do for both user experience and SEO, as internal links are a primary way Googlebot discovers and navigates your site. Our comprehensive SEO audit guide covers this process in detail.
5. Update your XML sitemap. Check your XML sitemap to ensure it does not contain any URLs that return 404 errors. Your sitemap should only include canonical, indexable URLs that return a 200 status code. Submitting a clean sitemap helps Google focus its crawling on your actual live pages rather than wasting requests on non-existent URLs. Google's documentation on building and submitting sitemaps provides detailed specifications for proper sitemap formatting.
6. Create a custom 404 page. For URLs that genuinely do not exist and should not be redirected, ensure your site serves a helpful custom 404 page. A good 404 page includes a clear message that the page was not found, a search bar so visitors can find what they were looking for, links to popular pages or categories on your site, and your standard site navigation. This improves user experience and reduces bounce rates from 404 pages.
Fixing Soft 404 Errors
Soft 404 errors are one of the trickiest crawl issues to diagnose and fix because they involve a contradiction: the server says the page is fine (HTTP 200), but Google determines the content is essentially worthless or indicates the page does not exist. Google's documentation on soft 404s explains that these are detected algorithmically when page content matches patterns associated with error pages or extremely thin content.
Common Causes of Soft 404 Errors
Understanding what triggers a soft 404 classification is essential for fixing them. The most common causes include pages with little or no meaningful content (such as empty product pages or stub articles), search result pages that return zero results, pages that display a "Page not found" or "This item is no longer available" message while still returning a 200 status code, paginated pages beyond the available content range, and dynamically generated pages with URL parameters that produce empty or duplicate content. Sites running e-commerce platforms are particularly susceptible to soft 404 issues, as products frequently go out of stock or get discontinued.
How to Fix Soft 404 Errors
For pages that truly do not exist: The fix is simple. Configure your server to return a proper 404 or 410 (Gone) HTTP status code instead of 200. A 410 status code is particularly useful for pages that have been permanently removed, as it tells Google to remove the page from the index more quickly than a standard 404.
For thin content pages: If the page is supposed to exist but has too little content, the solution is to add substantial, valuable content that justifies the page's existence. Google's helpful content guidelines provide a framework for evaluating whether a page provides genuine value to users.
For out-of-stock product pages: Rather than returning a soft 404 for products that are temporarily out of stock, keep the product page live with the product information intact and add a clear "out of stock" notice. If the product is permanently discontinued, redirect the page to the closest equivalent product or category page. Review how powerful crawl error fixes handle this specific scenario.
For empty search results pages: Add a noindex meta tag to internal search result pages, especially those that return zero results. Better yet, block crawling of your internal search URLs in robots.txt with a rule like Disallow: /search or Disallow: /?s=. This prevents Googlebot from wasting crawl budget on pages that will always have thin or no content.
Fixing Redirect Errors (3xx Issues)
Redirect errors in Google Search Console indicate that Googlebot encountered a problem while following redirects from one URL to another. These errors are not about simple, functional redirects. Rather, they flag situations where the redirect implementation itself is broken. The Search Engine Journal has documented that redirect issues are among the top five most common technical SEO problems found in site audits.
Types of Redirect Errors
Redirect chains occur when a URL redirects to another URL, which redirects to yet another URL, creating a sequence of multiple hops. While Google states it can follow up to 10 redirect hops, each hop adds latency and wastes crawl budget. Best practice, as recommended by Moz, is to limit redirects to a single hop from the original URL to the final destination.
Redirect loops happen when URL A redirects to URL B, which redirects back to URL A (or through a series of intermediate redirects that eventually circle back). Browsers and crawlers detect these loops and stop following them, resulting in an error. Redirect loops are often caused by conflicting redirect rules in your server configuration or CMS settings.
Redirect to invalid URLs occur when a redirect points to a URL that is malformed, uses an unsupported protocol, or exceeds the maximum URL length. These are typically caused by coding errors in your redirect rules.
How to Diagnose and Fix Redirect Errors
Start by running the problematic URLs through a redirect chain checker. The HTTP Headers tool can show you the full redirect chain for any URL, revealing each hop and its status code. Alternatively, use the command line with curl -LI [URL] to trace redirects manually.
For redirect chains, update the original redirect to point directly to the final destination URL, eliminating intermediate hops. For redirect loops, examine your .htaccess file, Nginx configuration, or CMS redirect settings to identify conflicting rules. Pay particular attention to rules that interact with trailing slash normalization, HTTP to HTTPS redirects, and www to non-www canonicalization, as these are the most common sources of loops.
After fixing redirect issues, use the Website SEO Score Checker to verify that your redirects are working correctly across your entire site. This tool crawls your pages and identifies any remaining redirect chains or loops that you might have missed.
Fixing Pages Blocked by robots.txt
When Google reports a page as "Blocked by robots.txt," it means your robots.txt file contains a directive that prevents Googlebot from crawling that specific URL. This is only an error if the blocked page is one you actually want Google to crawl and index. Many sites intentionally block certain paths, such as admin areas, staging environments, or private content. The problem arises when robots.txt accidentally blocks pages you want indexed. For a comprehensive understanding of robots.txt best practices, consult our guide on robots.txt optimization.
How to Identify Accidental robots.txt Blocks
Google provides a robots.txt Tester within Search Console that lets you test whether a specific URL is blocked or allowed by your current robots.txt rules. Use this tool to test each URL that appears in the "Blocked by robots.txt" category of your Pages report.
Common accidental blocks include overly broad Disallow rules that match more URLs than intended, leftover rules from a development or staging environment that were not removed before going live, rules that block entire directories containing both private and public content, and conflicts between Allow and Disallow rules. According to Google's robots.txt specification, when multiple rules match a URL, the most specific rule takes precedence.
How to Fix robots.txt Blocks
Edit your robots.txt file to either remove the blocking rule or add a more specific Allow rule for the URLs you want crawled. After making changes, use the robots.txt Tester to verify that the URLs are now accessible to Googlebot. Remember that changes to robots.txt take effect the next time Google fetches the file, which it typically does every 24 hours. You can speed up this process by submitting the updated robots.txt through Google Search Console.
noindex meta tag. If a page is blocked by robots.txt, Google cannot crawl it, which means it cannot see a noindex tag on that page. Paradoxically, if other sites link to your robots.txt-blocked page, Google may still index the URL (though without any content) based purely on external signals. If you want to prevent a page from appearing in search results, use the noindex meta tag and make sure robots.txt allows crawling so Google can see and obey the noindex directive. Learn more about this in Google's guide to blocking indexing.
Fixing DNS Resolution Errors
DNS errors are the rarest but potentially most devastating type of crawl error. They occur when Google's DNS servers cannot translate your domain name into an IP address, which means Google cannot even connect to your server. If this happens across your entire domain, your entire site effectively disappears from Google's ability to crawl.
Common Causes of DNS Errors
DNS resolution errors are typically caused by expired domain registration, misconfigured DNS records at your domain registrar, DNS propagation delays after making changes to nameservers, DNS server outages at your hosting provider, and DNSSEC misconfigurations. The ICANN documentation on DNSSEC is a valuable resource if you suspect DNSSEC issues are involved.
How to Fix DNS Errors
First, verify that your domain is properly registered and has not expired. Then check your DNS records using a tool like Google's DNS lookup tool or the command-line tool dig. Make sure your A records (for IPv4) and AAAA records (for IPv6) point to the correct server IP address. If you recently changed nameservers, allow up to 48 hours for full DNS propagation. Contact your hosting provider if you suspect their DNS servers are experiencing issues.
Using the URL Inspection Tool for Diagnosis
The URL Inspection tool in Google Search Console is your most powerful single resource for diagnosing crawl errors on specific pages. When you enter a URL into this tool, Google provides detailed information about the page's crawl status, indexing status, and any issues it has encountered. According to Google's documentation, the URL Inspection tool shows data from Google's actual index, not just a simulated crawl.
Key Information Provided by URL Inspection
The URL Inspection tool reveals whether the URL is indexed or not and the specific reason why, the last crawl date and the status code received, whether Google fetched the page successfully or encountered errors, how Google discovered the URL (through a sitemap, internal link, or other source), the canonical URL that Google has selected for the page, mobile usability issues, and structured data validation results. You can also request that Google recrawl the URL immediately, which is useful after you have fixed an error and want Google to verify the fix without waiting for the next scheduled crawl.
Crawl Stats Analysis: Understanding Google's Crawl Behavior
The Crawl Stats report, found under Settings in Google Search Console, provides a macro-level view of how Googlebot interacts with your entire site over a 90-day period. While the Pages report shows you specific URLs with errors, the Crawl Stats report reveals broader patterns in Google's crawling behavior that can help you identify systemic issues before they result in widespread errors.
Distribution of Crawl Response Codes (Industry Average, February 2026)
Source: Aggregated data from HTTP Archive and Screaming Frog industry benchmarks, February 2026.
What to Look for in Crawl Stats
The Crawl Stats report shows three primary metrics: total crawl requests per day, total download size per day, and average response time. A sudden drop in crawl requests often indicates that Google is encountering widespread errors and has reduced its crawl rate. A spike in average response time suggests your server is struggling under load, which can precede 5xx errors. Large fluctuations in download size may indicate that some pages are returning error pages (which are smaller) instead of your actual content.
The report also breaks down crawling by response code, file type, Googlebot type (smartphone vs. desktop), and purpose (discovery vs. refresh). For most sites in 2026, the majority of crawling is done by the smartphone Googlebot, reflecting Google's mobile-first indexing approach. If your site has mobile-specific issues that do not appear on desktop, you may see crawl errors from the smartphone bot but not the desktop bot.
Crawl Budget: Why It Matters and How Crawl Errors Waste It
Crawl budget is a concept that every website owner should understand, especially if your site has more than a few thousand pages. As Google's official crawl budget documentation explains, crawl budget is determined by two factors: the crawl rate limit (how fast Googlebot can crawl without hurting your server) and the crawl demand (how much Google wants to crawl based on the popularity and freshness of your URLs).
Every crawl error represents a wasted portion of your crawl budget. When Googlebot requests a URL and receives a 5xx error, a 404 response, or gets stuck in a redirect loop, that request counts against your crawl budget but produces no useful result. For small sites with a few hundred pages, this waste is negligible because Google can easily crawl everything. But for large sites with tens of thousands or millions of pages, crawl budget waste can mean the difference between new content being discovered in hours versus weeks.
The following chart shows how different types of crawl errors impact crawl budget based on analysis from Lumar (formerly DeepCrawl) across enterprise-level websites.
Crawl Budget Impact by Error Type (Relative Waste Factor)
Source: Analysis based on Lumar enterprise crawl data and Google Search Central guidelines.
To learn more about managing your crawl budget effectively, see our detailed guide on crawl budget optimization tips.
Common Causes of Crawl Errors
While we have covered how to fix individual error types, it is equally important to understand the broader circumstances that cause crawl errors to appear in the first place. Knowing the root causes helps you prevent errors from occurring rather than constantly reacting to them after the fact.
Site Migrations
Site migrations are the single largest source of crawl errors for established websites. Whether you are changing domains, restructuring your URL hierarchy, switching CMS platforms, or moving from HTTP to HTTPS, a migration touches every URL on your site. Even well-planned migrations frequently result in temporary crawl errors as redirect rules are implemented, tested, and refined. According to data compiled by Search Engine Journal, roughly 60 percent of site migrations experience at least some period of organic traffic loss, and crawl errors are a primary contributor.
To minimize crawl errors during a migration, create a comprehensive redirect map before the migration, covering every old URL and its corresponding new URL. Test all redirects in a staging environment. Implement redirects before DNS changes take effect. Monitor Google Search Console daily for the first two weeks after migration. Keep old server infrastructure running for at least 30 days as a fallback. For a thorough migration checklist, read our technical SEO secrets guide.
Broken Internal and External Links
Broken links are a chronic source of 404 errors. Internal links break when pages are deleted, URLs are changed, or content is reorganized without updating the links that point to moved content. External links break when other websites link to pages on your site that no longer exist, or when they link to URLs with typos. While you cannot control what other sites link to, you can set up 301 redirects for commonly mislinked URLs. The W3C's guidance on persistent URIs recommends designing URL structures that are stable and future-proof.
Server Configuration Issues
Misconfigured servers are responsible for a wide range of crawl errors, from 5xx responses to redirect loops to incorrect robots.txt directives. Common configuration problems include PHP memory limits that are too low for complex pages, FastCGI timeout settings that are shorter than your longest page generation time, incorrect SSL certificate configurations that cause HTTPS errors, firewall rules that block Googlebot's IP ranges, and WAF (Web Application Firewall) rules that mistakenly identify Googlebot as a bot to be blocked. Cloudflare's documentation on bot verification explains how to whitelist legitimate crawlers while maintaining security.
CMS and Plugin Updates
Content management systems and their plugins or extensions can introduce crawl errors when they are updated. A WordPress plugin update might change URL structures, break permalink settings, or conflict with other plugins. A Shopify theme update might alter the way product URLs are generated. Always test CMS updates in a staging environment first, and monitor your crawl errors closely for a week after any major update.
Crawl Error Priority Matrix
Not all crawl errors deserve the same level of urgency. The following priority matrix helps you decide which errors to fix first based on their impact on your SEO performance and user experience.
| Priority Level | Error Types | Criteria | Target Resolution |
|---|---|---|---|
| Critical (P0) | Sitewide 5xx, DNS errors | Entire site or major sections are inaccessible to Googlebot | Within hours |
| High (P1) | 5xx on high-traffic pages, 404s with backlinks, redirect loops | Important pages losing rankings or wasting significant link equity | Within 24 hours |
| Medium (P2) | Soft 404s, redirect chains, robots.txt blocks on indexable pages | Pages losing indexing or experiencing degraded crawl efficiency | Within 1 week |
| Low (P3) | 404s on old, low-value pages with no backlinks | Minimal impact on traffic or crawl budget | Within 1 month |
| Informational | Intentional 404s, correctly blocked pages | Pages that are supposed to return errors or be blocked | No action needed |
Using Screaming Frog for Crawl Auditing
Screaming Frog SEO Spider is one of the most widely used tools for conducting comprehensive crawl audits of websites. It works by simulating how a search engine crawler navigates your site, following links, checking response codes, and cataloging every URL it finds. For crawl error detection and remediation, Screaming Frog offers several advantages over relying solely on Google Search Console.
Why Use Screaming Frog Alongside Google Search Console
Google Search Console shows you errors that Googlebot has actually encountered, which is incredibly valuable. However, it only shows errors for URLs that Google has tried to crawl, and it may not immediately reflect errors on newer pages or recently changed URLs. Screaming Frog, by contrast, crawls your site on demand and identifies errors in real time. It also provides context that Search Console does not, such as which pages link to broken URLs (source pages), the anchor text used in those links, the full redirect chain for each redirect, orphan pages that have no internal links pointing to them, and response time for each URL. Using both tools together gives you the most complete picture of your site's crawl health.
How to Run a Crawl Audit with Screaming Frog
1. Configure the crawl settings. Before starting your crawl, configure Screaming Frog's settings to match Googlebot's behavior. Set the user agent to Googlebot, enable JavaScript rendering if your site relies on client-side rendering, configure the crawl speed to avoid overwhelming your server, and set the crawl depth to match your site's architecture. The Screaming Frog user guide provides detailed instructions for each of these settings.
2. Start the crawl and review results. Enter your site's URL and start the crawl. As it progresses, you can filter the results by response code to isolate specific error types. The Response Codes tab shows all URLs grouped by their HTTP status code, making it easy to find 4xx and 5xx errors. The Redirect Chains report shows all redirect sequences, including the number of hops and whether any chains end in errors.
3. Cross-reference with Search Console data. Export both your Screaming Frog results and your Google Search Console error data, and combine them in a spreadsheet. Look for URLs that appear as errors in both tools (these are your highest priority), URLs that appear in Search Console but not Screaming Frog (these may be linked from external sources), and URLs that appear in Screaming Frog but not Search Console (these are errors Google has not yet encountered but likely will). Our complete SEO audit guide walks you through this process in detail.
Setting Up Crawl Error Monitoring
Fixing crawl errors is only half the battle. Without ongoing monitoring, new errors will inevitably appear as your site evolves, content is added or removed, and infrastructure changes occur. Setting up a systematic monitoring process ensures you catch and fix errors quickly before they impact your search performance.
Monitoring Tools Comparison
| Tool | Free/Paid | Automated Alerts | Crawl Frequency | Best For |
|---|---|---|---|---|
| Google Search Console | Free | Email alerts for critical issues | Continuous (Google's schedule) | Primary monitoring, official Google data |
| Screaming Frog | Free (500 URLs) / Paid | Scheduled crawls with reporting | On-demand or scheduled | Detailed technical audits |
| Ahrefs Site Audit | Paid | Yes, with customizable thresholds | Weekly or custom schedule | Ongoing monitoring with trend data |
| Semrush Site Audit | Paid | Yes, email and in-app | Daily, weekly, or custom | Comprehensive site health scoring |
| Lumar | Paid (Enterprise) | Yes, with workflow integration | Continuous or scheduled | Large-scale enterprise monitoring |
| Sitebulb | Paid | Scheduled audits with reports | On-demand or scheduled | Visual crawl analysis and reporting |
| Bright SEO Tools | Free | On-demand checks | On-demand | Quick diagnostics and score checks |
Creating a Monitoring Schedule
For most websites, the following monitoring schedule provides a good balance between thoroughness and efficiency. Check Google Search Console's Pages report weekly for new errors. Run a full Screaming Frog crawl monthly (or after any significant site changes). Set up automated alerts in Ahrefs or Semrush for daily monitoring. Review the Crawl Stats report in Search Console bi-weekly. After any deployment, migration, or major content update, run an immediate crawl check using the spider simulator to catch errors before they affect your search visibility.
Prevention Strategies: Stopping Crawl Errors Before They Start
The most efficient approach to crawl errors is preventing them from occurring in the first place. Reactive fixing is always slower and more costly than proactive prevention. Here are the strategies that successful technical SEO practitioners use to minimize crawl errors.
Stable URL Architecture
Design your URL structure with permanence in mind. As Tim Berners-Lee wrote for the W3C, "cool URIs don't change." Avoid including dates, IDs, or other elements in URLs that might change over time. Use descriptive, keyword-rich slugs that accurately represent the content and are unlikely to need modification. When you do need to change URLs, always implement proper 301 redirects and update all internal links. For guidance on building an optimal URL structure, our site architecture guide provides practical recommendations.
Robust Redirect Management
Maintain a centralized redirect map that documents every redirect on your site, including the source URL, the destination URL, the redirect type (301 or 302), the date it was implemented, and the reason for the redirect. This document becomes invaluable during site migrations and when troubleshooting redirect chains. Store this map in version control alongside your server configuration files. The Apache mod_rewrite documentation and Nginx rewrite module documentation are essential references for implementing redirects correctly.
Automated Testing in CI/CD Pipelines
If your website is built and deployed through a CI/CD pipeline, integrate automated tests that check for crawl errors before code reaches production. These tests should verify that all pages in your sitemap return a 200 status code, confirm that no internal links point to 404 URLs, validate that all redirects resolve correctly within one or two hops, check that robots.txt does not accidentally block important pages, and ensure that server response times are within acceptable thresholds. Tools like webhint and custom scripts using libraries like httpx can automate these checks.
Content Lifecycle Management
Establish clear processes for what happens when content is removed from your site. Before deleting any page, check whether the page has incoming backlinks (redirect if yes), verify that no internal links point to the page (update if they do), determine whether the page appears in any sitemaps (remove it), decide whether a redirect is needed (redirect to the most relevant alternative), and update any marketing materials, emails, or social media posts that link to the page. This process, while time-consuming, prevents the vast majority of 404 errors that result from content removal.
Server Health Monitoring
Use uptime monitoring services like UptimeRobot, Pingdom, or Datadog to detect server outages and performance degradation before they become crawl errors in Google Search Console. These services ping your server at regular intervals (every minute for most paid plans) and send immediate alerts via email, SMS, or Slack when they detect downtime or slow response times. Early detection means you can fix server issues before Googlebot encounters them.
Advanced Crawl Error Troubleshooting
Some crawl errors are straightforward to diagnose and fix. Others require deeper investigation. This section covers advanced troubleshooting techniques for situations where the standard approaches do not resolve the issue.
JavaScript-Related Crawl Issues
As websites increasingly rely on JavaScript frameworks like React, Angular, and Vue.js for rendering content, a new category of crawl issues has emerged. Google's JavaScript SEO documentation explains that Googlebot processes JavaScript in two phases: an initial crawl that fetches the raw HTML, and a deferred rendering phase where JavaScript is executed to produce the final page content. If your JavaScript fails during the rendering phase, Google may see a blank or partially rendered page, leading to soft 404 classifications or "Crawled - currently not indexed" statuses.
To troubleshoot JavaScript rendering issues, use the URL Inspection tool's "View Tested Page" and "View Rendered Page" features. Compare the rendered HTML to what you see in a browser to identify discrepancies. The Chrome Lighthouse tool can also help identify JavaScript errors that might affect Googlebot's ability to render your pages.
Handling Crawl Errors from Parameter URLs
Websites that use URL parameters for sorting, filtering, pagination, or session tracking often generate enormous numbers of crawl errors. Each unique combination of parameters creates a new URL in Google's eyes, and if many of these combinations produce empty or duplicate content, they result in soft 404s or duplicate content issues. Google's URL consolidation guide recommends using canonical tags, robots.txt, or the URL Parameters tool (when available) to manage parameter-based URLs.
International and Multilingual Site Crawl Issues
Websites with multiple language versions often experience crawl errors related to hreflang implementation, incorrect redirects based on geographic IP detection, and duplicate content across language versions. Google's hreflang documentation and the hreflang tags generator by Aleyda Solis are essential resources for getting international crawling right.
Measuring the Impact of Crawl Error Fixes
After investing time and effort in fixing crawl errors, you want to know whether your work has produced tangible results. Here is how to measure the impact of your crawl error remediation efforts using both Google Search Console and third-party tools.
Key Metrics to Track
Monitor these metrics before and after fixing crawl errors to quantify your improvement: the total number of indexed pages (should increase as previously errored pages get indexed), the number of errors in each category (should decrease), organic search traffic from Google (should increase as more pages become indexable), the average crawl rate in Crawl Stats (may increase as Google encounters fewer errors), and server response time as reported in Crawl Stats (should remain stable or decrease). Cross-reference these Search Console metrics with data from Google Analytics to see whether the increased indexing translates into actual traffic and conversions.
Validation Timeline
| Milestone | Timeframe After Fix | What to Expect |
|---|---|---|
| Initial recrawl | 1-3 days | Google begins re-crawling fixed URLs, especially if you used Request Indexing |
| Validation started | 3-7 days | Search Console shows "Validation started" status for the error category |
| Partial validation | 1-2 weeks | Many URLs move from "Error" to "Valid" status; some may still be pending |
| Full validation | 2-4 weeks | All affected URLs have been recrawled and their new status is confirmed |
| Ranking recovery | 2-8 weeks | Previously errored pages begin appearing in search results and ranking |
| Full traffic recovery | 1-3 months | Organic traffic stabilizes at expected levels for the fixed pages |
Crawl Error Checklist: A Quick Reference Guide
Use the following checklist as a quick reference when you encounter crawl errors. This summarizes the diagnostic steps and fixes covered throughout this guide, organized by error type. For a more comprehensive technical SEO audit process, follow our complete SEO audit walkthrough.
For Server Errors (5xx): Check server error logs for the specific cause. Monitor server resource usage (CPU, memory, disk). Review recent code deployments or configuration changes. Test affected URLs with the URL Inspection tool. Implement caching if the cause is server overload. Upgrade hosting resources if consistently hitting limits. Validate the fix in Search Console after implementing.
For 404 Errors: Determine if the 404 is intentional or accidental. Check for backlinks to the 404 page using Ahrefs or Semrush. Implement 301 redirects to the most relevant existing page. Fix all internal links pointing to 404 URLs. Remove 404 URLs from your XML sitemap. Create a helpful custom 404 page for genuinely missing content.
For Soft 404 Errors: Identify whether the page should exist or not. For non-existent pages, return a proper 404 or 410 status code. For thin content pages, add substantial value to the page. For empty search pages, add noindex or block in robots.txt. For out-of-stock products, keep the page with appropriate messaging or redirect.
For Redirect Errors: Trace the full redirect chain using HTTP header tools. Eliminate redirect chains by pointing directly to the final URL. Break redirect loops by reviewing conflicting rules. Test all redirects after changes to confirm they work correctly.
For robots.txt Blocks: Test URLs with the robots.txt Tester in Search Console. Review robots.txt rules for overly broad Disallow directives. Add specific Allow rules for pages that should be crawled. Remember that robots.txt blocks crawling, not indexing. Read our robots.txt optimization guide for best practices.
For DNS Errors: Verify domain registration status. Check DNS records using Google's DNS lookup tool. Confirm A and AAAA records point to the correct IP. Allow 48 hours for DNS propagation after changes. Contact your registrar or hosting provider for persistent issues.
Frequently Asked Questions
Final Thoughts
Crawl errors are an inevitable part of managing a website, but they do not have to be a persistent drag on your search performance. By understanding the different types of crawl errors, knowing where to find them in Google Search Console, and following systematic diagnostic and fix processes, you can keep your site in excellent crawl health.
The most important takeaway from this guide is that crawl error management should be proactive, not reactive. Set up monitoring tools, establish regular audit schedules, implement prevention strategies during content changes and site migrations, and use the powerful crawl error fix strategies outlined in this guide. When errors do appear, prioritize them based on their impact using the priority matrix above, fix the most critical issues first, and validate your fixes through Google Search Console.
Remember that a healthy, error-free crawl experience benefits not just search engines but also your users. Every server error, broken link, and misconfigured redirect represents a moment where a potential visitor could not access your content. By fixing crawl errors, you are simultaneously improving your SEO and your user experience, which is exactly the kind of alignment that Google's helpful content system rewards.
For ongoing technical SEO improvements beyond crawl errors, explore our full library of guides in the Technical SEO category, use the XML Sitemap Generator to ensure your sitemaps are always up to date, and run regular site health checks with the Website SEO Score Checker to catch issues before they become problems.